Friday, 10 April 2015

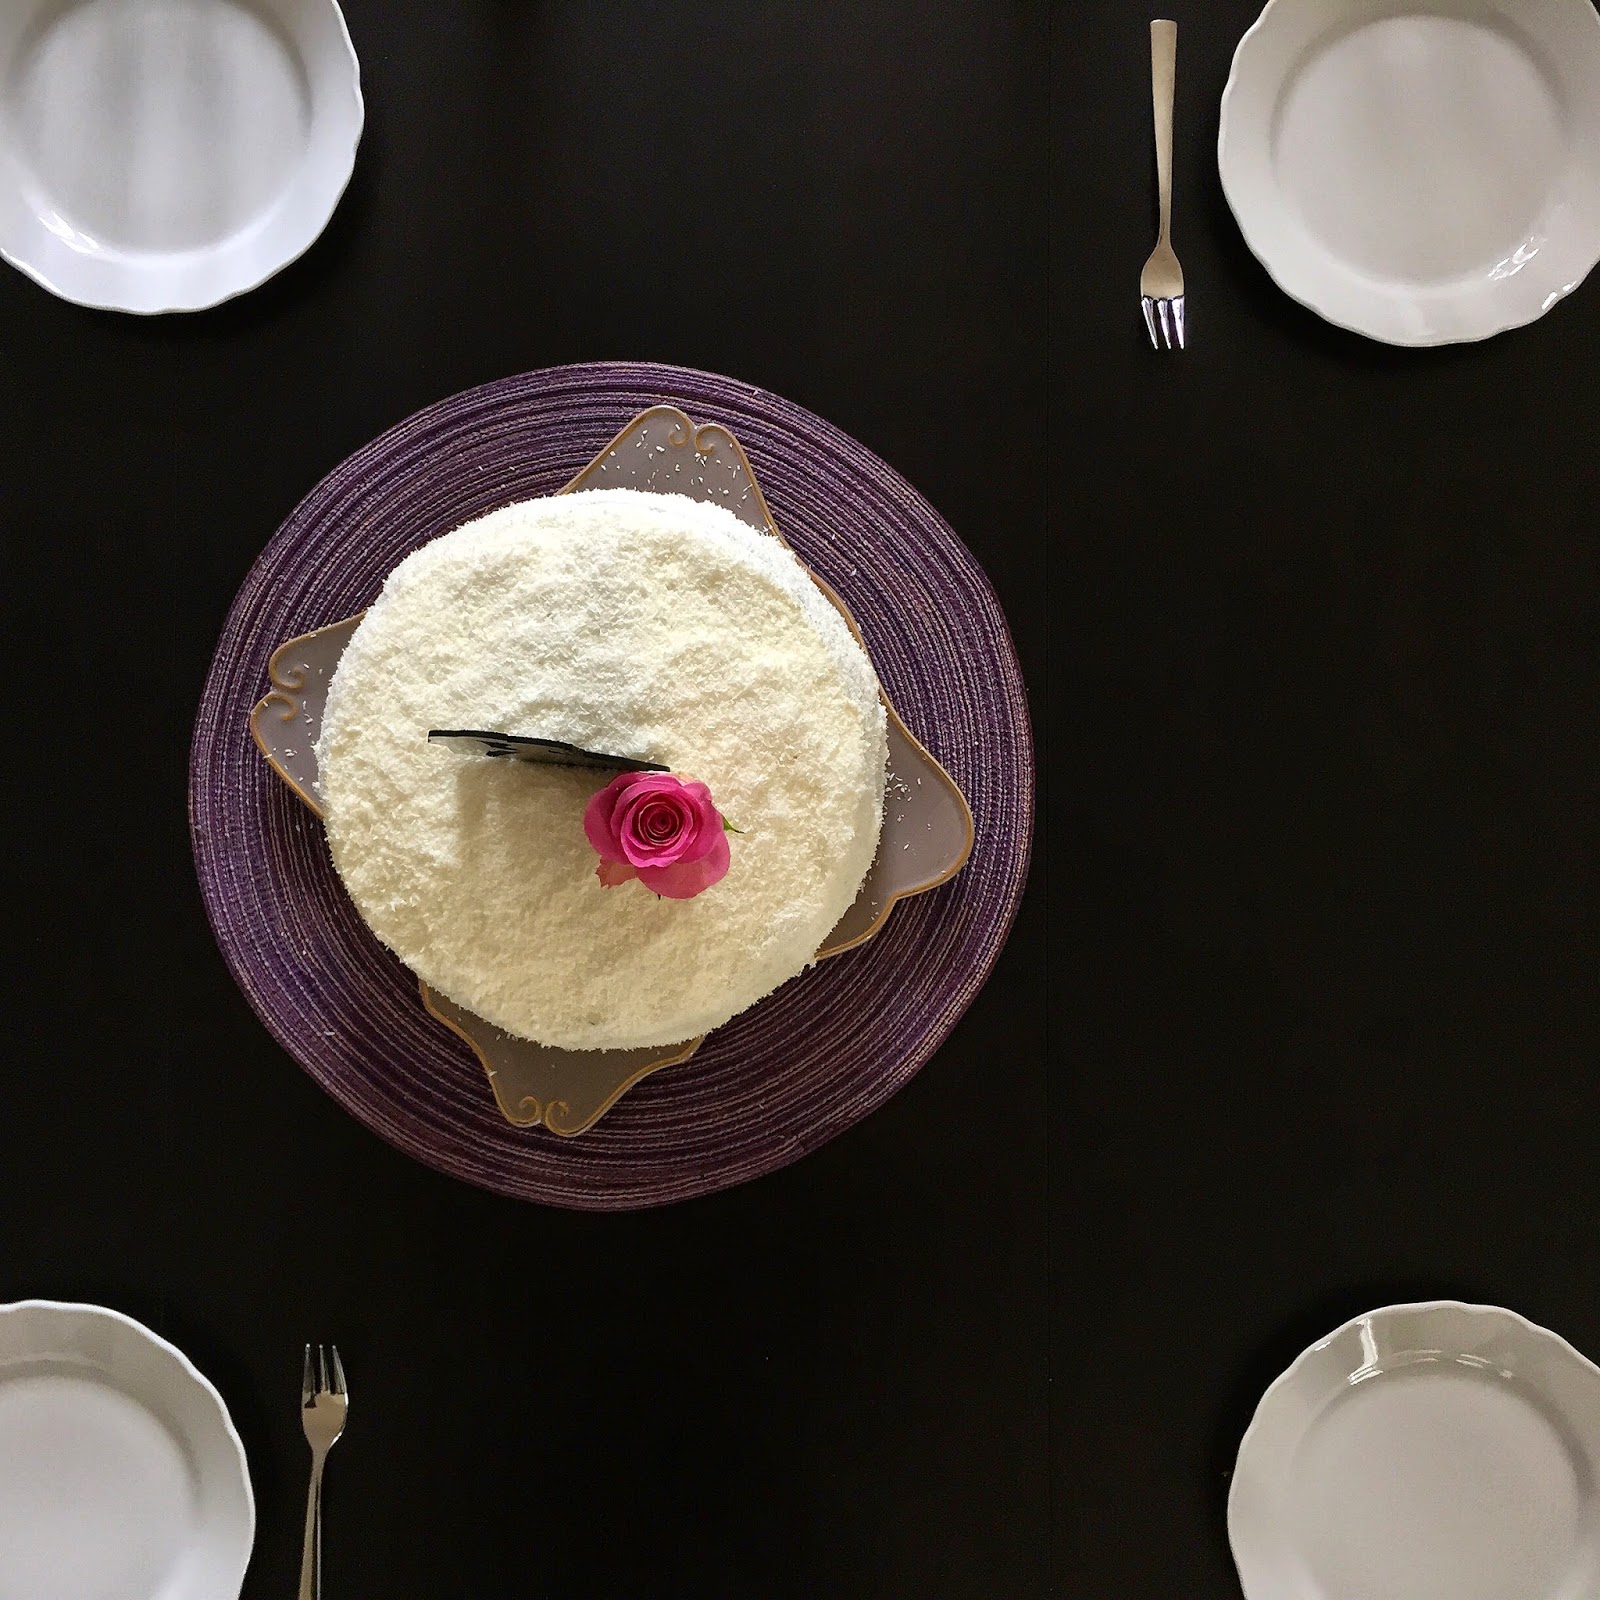
Coconut Wedding Cake

Hello my sweet ladies and gentlemen,

I love weddings. Everybody is in such a good  mood, bride and groom are the two happiest people in the world and the food...oh my gosh, the food is always so good. As you my already know me, I think that the wedding cake is always the best part of a wedding. it kind of represents the couple itself, either light, fruity and creamy or rich and chocolatey. Each wedding cake tells its own little story.


The wedding cake I am sharing with you today, tells the story of a really lovely couple. They are young, happy and they love life. They are always surrounded by a lot of friends and make everyone smile. In their company, you can forget the normal course of life and just enjoy the moment and have a good laugh. Just as them, the wedding cake I made for them is also very lovely.
It is a high, creamy and fluffy coconut cake with multiple layers of fluffy coconut sponge cake, white-chocolate-coconut cream filling and raspberry jam, which is then covered with light vanilla whipped cream and covered in shredded coconut. It is a white cloud of creamy fluff and it makes you happy just looking at this heavenly goodness.


The cake is perfect for spring and summer and it would suit any kind of seaside Bahamas wedding or a natural countryside wedding, you can also use it for all kinds of festivities in your family and neighborhood. If you think that it is a little bit too big for an ordinary sunday coffee, then you can just use half of the recipe and make a smaller cake.
If you prefer a more tropical taste, you may also use passionfruit or mango jam instead of raspberry jam. If you want it to taste like a bounty bar, add some cocoa powder to the dough. You see, there are no limits for you to make that perfect wedding cake of your dreamy.

I really prefer the all white, plain coconut cake because it is light, fresh and just so delightful. Also, it is not too sweet and the cream filling is not too rich. It is that kind of cake, where you juts want to grab a fork and dig in and eat it all by yourself.
But remember what your mum always told you: "Be nice and share with your friends". This cake is too good to eat it on your own.


Ingredients for the sponge cakes:

8 eggs
300g flour
300g sugar
100g shredded coconut 
3-4 drops natural coconut extract 
pinch of salt


Ingredients for the filling:

400g heavy cream
500g white chocolate
500g fresh mascarpone 
3 tbs shredded coconut

1 jar of seedless raspberry jam 


Ingredients for the whipped cream:

400g heavy cream 
1 teaspoon vanilla extract 


150g shredded coconut to cover


Preparation:

First of all, we want to start by making the white-chocolate ganache. Thereto, heat up 400g of heavy cream in a saucepan. Chop the white chocolate into little pieces and put them in a large bowl. Then, pour the hot cream over that and let it sit for a few minutes, to then stir with a whisk until it is all combined and there are no chunks on there. Let it cool and then, cover it with some kitchen wrap and put it in the fridge overnight to set.
The next day, you want to start by preheating your oven to 180°. Then, continue by preparing the dough: Separate the egg yolks and the egg whites into two large bowls. Add a pinch of salt to the egg whites and beat them until really stiff and fluffy. (You must be able to flip the bowl, without the egg wihte-mixture coming out)
After that, mix the sugar and the egg yolks and beat them with a hand mixer until the mixture is almost white. Now, start adding alternating a few tablespoons of flour and then, a few tablespoons of egg whites and then mix well between those steps. (Be careful and hold the bowl angular to whisk in more air) Then, grease two baking tins with butter and fill the dough in equal parts in it and bake them for about 20-25 minutes until they are golden brown on the outside.


When the cake has cooled, you are now ready to cut each one in half so that you'll have 4 equal parts.
Then, take your white chocolate ganache from the other day and mix it with the mascarpone and the coconut flakes and mix it with a hand mixer until it becomes a fluffy cream.
Now, spread the raspberry jam on top of three of the cake layers and continue with the cream filling. Then, put it all together. The top layer should be plain and without any topping (both the jam and the filling should be only on the inside of the cake)
Then, whip up the heavy cream with the vanilla extract and coat the whole cake with it. It doesn't need to be all to perfect because you will now cover it all with as much shredded coconut as possible.

Now, your cake is all done and you can decorate however your heart desires. Have fun!


Sunday, 22 March 2015

Raspberry and Peach Cheesecake

Hello sweet ladies and gentlemen,

spring is finally here! On friday it was the first official day of spring and I enjoyed the warm weather so much. It is quite refreshing to breathe in some clean, fresh spring air, to feel the sun on the skin and to see all the different spring flowers in the most beautiful colors, yellow, pink and blue. It is a feeling like the whole environment comes back to life and everybody is celebrating by taking long walks and bike rides outside.
Every day is so much more beautiful, when you wake up to bright sunshine and singing birds.
So this weekend, I thought that I should bake something fresh and fruity to celebrate the warm weather. Raspberries and peaches are my favorite fruits to combine with a cheesecake so I chose them as a colorful topping.

This cheesecake has no crust, which makes it super light and creamy. Peaches and raspberries are the perfect combination of sweet and sourly flavors and a perfect touch of color. The whole cake is the very sweet, creamy, fresh and fruity. The raspberries add the perfect amount of tingling flavor to the creamy vanilla cream filling.
This creamy deliciousness is surprisingly easy to make, quite fancy to look at and it will definitely impress all your guests and family.


Ingredients:

750g fresh ricotta cheese
150g cream cheese
220g sugar
1 tsp vanilla extract
5 large eggs
3 tbs cornstarch

some fresh raspberries and one can of peaches

butter and grated almonds for the baking tin


Preparation:

First of all, preheat your oven to 160°. Then, grease your baking tin with butter and sprinkle a handful of grated almonds on top of it to achieve a thin layer of almonds all over the tin.
Now, you can start mixing the cheesecake mixture. For that, put all the wet ingredients in a large bowl and mix it with a whisk until it is all well combined. Make sure you don't over mix because you want the cheesecake to be very thick and creamy in consistency. Then, add the sugar and starch and mix again until it is all incorporated.
After that, you can now fill it in the prepared baking tin and decorate it with fresh raspberries and slices of the canned peaches. Then, put it in the oven for about 50-60 minutes until the edges are golden brown and it is all cooked in the middle.


After the cake has completely cooled you are now ready to enjoy! Notice: After one day in the fridge it is even more creamy and delicious.


Sunday, 15 February 2015

Decadent Double Chocolate Cookies

Hello my sweet ladies and gentlemen,

do you know that feeling when all of a sudden guests are coming and you, as a good host, want to serve something nice like a piece of cake or some cookies... Well, normally it wouldn't be such a big deal to come up with something nice but then you realize it is sunday, all the supermarkets are closed and even worse, you have hardly anything in the house to bake a reasonably cake with.

What now? The guests will be arriving any minute and you have nothing to offer besides a glass of water and a cup of coffee. Something has to happen immediately and it has to be quick, easy and delicious.


If you are in a comparable situation, you may now calm down because I have the perfect solution for you.These Chocolate cookies are no ordinary chocolate cookies, they are very rich, not to sweet and they have the perfect cookie texture...a bit of a crunch on the outside and heavenly moist and chewy on the inside. Everybody loves cookies, it's the perfect little treat to go with a cup of coffee or tea.

It only takes you 5 minutes to prepare the batter and then, 10 minutes to bake and that's it. These chocolate cookies are not only surprisingly easy to make, but also unimaginably delicious. Your guests are going to eat them all within seconds.


-An Old-Fashioned Welcome-


There's nothing cheers a fellow up just like a hearty greeting,
A handclasp and an honest smile that flash the joy of meeting;
And when at friendly doors you ring, somehow it seems to free you
From all life's doubts to hear them say: "Come in! We're glad to see you!"

by Edgar A. 


Ingredients:

100g dark chocolate
270g all purpose flour
4-5 tbs cacao powder
200g brown sugar (I used coconut sugar)
180g butter (or 5 tbs coconut oil)
a pinch of sea salt
1 tsp vanilla extract


Preparation:

In a saucepan, melt the butter, add the cacao powder and stir it in really well until it is all incorporated. Then, take the saucepan off the heat and add all the other ingredients besides the chocolate and again mix it all well together with a hand mixer or your hands.

Now, break the chocolate into little cubes and gently stir it in the mixture. Then, with a spoon place 9-12 equal portions on a lined baking tray. While the oven preheats to 200°, place the baking tray in the fridge.Then, put it in the oven for 10 minutes and let them cool for 10-15 minutes before serving.


Sunday, 11 January 2015

Walnut-Marzipan Rolls

Hello my sweet ladys and gentlemen,

it is january now, which means we are in the middle of winter. The holidays are over and we are looking forward to ski trips in the mountains, warm fireplaces in a cozy lodge and sledding with friends and family. And what is better after a long day in the cold winter wonderland of glistening snow and crisp mountain air, then some of the most delicious, sweet and still warm Walnut-Marzipan rolls? Accompanied by a cup of hot tea, mulled wine or eggnog these decadent Nut rolls are the perfect afternoon treat when you are having friends and family over or even for you alone to enjoy with a good book and a purring cat by your side.
In the winter time, nuts (especially walnuts) and marzipan are the most popular things to work with when it comes to baking. Walnuts have such a nice flavor...No matter if it is a roast venison with cranberries or a sweet dessert, they go with everything. 

"A long time ago, almonds and sugar were very luxury goods and
 it was first made in persia to please the desires of wealthy people."


These rolls are not only fluffy and moist, but they also have a rich and nutty flavor to them, that works perfectly together with the drizzle of sweet frosting on top. If you take one bite, the flavors combine in your mouth, the nuts and the marzipan playing a duet of harmony and perfection...and at this point you are already addicted. These are not only for marzipan lovers. So even if you are not a huge marzipan fan, still give them a try and you'll see: Everybody loves them!! 


Ingredients for the dough:

600g all purpose flour
1 large egg
100g sugar
100ml warm milk
50g butter
42g fresh yeast


Ingredients for the filling:

100g grated walnuts
50g grated almonds
100g marzipan
150g butter
1 large egg
100g sugar
1tsp cinnamon


Ingredients for the frosting:

100g icing sugar
1-2 tbs cold water


Preparation: 

Grab yourself a large mixing bowl and whisk your butter, milk and sugar together. Then, in a small bowl mix a little bit of  warm water with one teaspoon of sugar and crumble your fresh yeast in it and let that sit for two minutes. Now, stir it a litte bit and then pour it in your butter-milk mixture. After that, add all the flour and give it agood stir until it is a smooth batter. If the dough is too sticky, sprinkle some more flour on top and work it in with your hands until it is how you want it. Then, take another large bowl, grease it with some vegetable oil and put your dough in it. Cover it with a kitchen towel and put it somewhere warm. (Tip: I either place mine near the heater or under the bedcovers.) Now, leave it there for a good two hours to rise. During that time you can start making the filling. In a medium sized bowl, put all the ingredients together and mix them with a fork or as I do, use your hands and set it aside until the dough is ready. 
After your dogh is really doubled in volume, you can roll it out until it is about 1 - 1,5 cm thick. Spread the filling evenly on top and carefully roll it. Now, use a sharp knife to cut  10-12 equal pieces. Take a large baking tray or a muffin form and place the rolls on it and make sure there is enough space between them because they will rise again for one hour. And now they are ready to go into the preheated oven at 170° for about 45 minutes. The time really depends on your type of oven, so check them every now and then to make sure they won't burn on the top. After they are out of the oven, give them some time to cool and then stir the icing sugar and the water together and drizzle it on top of the rolls. 


Tuesday, 6 January 2015

Rich Chocolate Tart

Hello Sweet lades and gentlemen,

I decided that I don't want to keep it as a secret anymore. I love chocolate. Well, this is not really a secret is it? Everybody loves chocolate. And you can make so many different things with it: Hot Chocolate, Mousse au Chocolat, Chocolate cake, Chocolate Truffles, Chocolate Cookies...the list goes on and on. Then, when I was in France I discovered the perfection of chocolate. A real "Tarte au Chocolat" is the holy grail of every chocolate lover. Especially, when it is served hot! I could eat one whole cake within minutes.


Many people think that making a classic Chocolate Tart with a perfectly soft core is a well kept secret and so did I. But I tried out many different recipes and finally I developed the perfect way to make Chocolate Tart. There are only two important things: Only use high quality dark chocolate and keep an eye on the time. Using high quality dark chocolate gives it the original, rich and creamy flavor. And I found out that 14-15 minutes in the oven is the perfect time. If you follow these directions, the Chocolate Tart can't go wrong. When the Tart came right out of the oven, I garnished it with some red berries and I sprinkled a little bit of "Fleur de sel" on top of it. Fleur de sel, the flower of salt, is a high quality sea salt, it brings out the flavors of the chocolate perfectly and it looks pretty as well.
Eating a piece of this lightly salted, rich Chocolate Tart makes me feel like I'm on holiday in France, sitting in a beautiful Café on the pier, enjoying the fresh sea air and the taste of dark chocolate. It truly is perfection. Moments like these, are the little things in life that make it worth living.


Ingredients:

300g dark chocolate
300g unsalted butter
150g sugar
6       eggs
3tbs  all purpose flour


Preparation:

Over a water bath, melt the butter, chocolate and sugar. Make sure that I does not get too hot and the chocolate does not burn on the bottom. Then, beat the eggs for about 4-5 minutes until they are really light and fluffy. After the chocolate-butter mixture has cooled a little bit, pur the eggs in there and mix it all with a hand mixer. Now, sift the flour in there and mix again until it is all incorporated.
Fill the mixture in a springform and place it in the fridge until the oven is preheated to 200°. Then, after about 14-15 minutes baking time the outside should be cooked and the inside should be still really soft and wet. That is exactly how you want it. Let it cool for just a few minutes and serve warm.


Sunday, 21 December 2014

Rich Cherry Cheesecake

Good evening sweet ladys and gentlemen,

I am really sorry that I did not write a blogpost last Sunday... I have been to a beautiful wedding a few hours from where I live and my whole week was quite busy so I had hardly any time to do something blog related. But this today I am coming with something special! 
As it is holiday season, my husband and I had a lot of family over this weekend and I did a whole lot of baking. I find it so nice to have a lot of family around me. The air is filled with laughs and giggles and everyone is happy and excited...Candles are burning on a beautiful table setting, cakes and other sweet treats are laid out beautifully on some vintage plates and the air smells of coffee and a warm fire is burning in the corner of the room. To me, this is one of these moments that make life so worth living. Everything is perfect, everybody is happy and all worries are gone for a moment. 

The Power Of Family 

Family is, 

heaven sent from our father above, 
bonded by the power of love.
No matter what family has each others back,…

by Antony Smith - Family Friend Poems


For our afternoon tea I made different treats. One of them was a very dense and creamy cheesecake, topped of with a rich and fruity cherry sauce. The crust is made of crushed butter cookies, almonds and a lot of cinnamon. The filling contains a lot of heavy cream cheese as well as fresh vanilla which gives a perfectly rich aroma. And the cherry sauce on top, I am being honest with you guys.. It is the perfect cheesecake for the holiday season. Seriously, everybody loved the cake and it was gone within minutes. The combination of cheesecake and cherries is like a firework of flavors. The Cherries are very fruity and a little bit sour, then the cheesecake filling is soft, creamy and perfectly sweet. Not to mention the crust, whose wintery flavors like almonds and cinnamon harmonise perfectly with the other flavors of the cake.


Ingredients for the crust: 

100g butter cookies (crushed or blended)
100g grated almonds 
150g butter
2 tsp cinnamon


Ingredients for the filling:

4 large eggs
800g cream cheese
100g sour cream 
180g sugar
Seeds of 1 vanilla bean
6 tbs all purpose flour
3 tbs maple sirup
pinch of salt and cinnamon


Ingredients for the sauce:

1 glass jar cherries (about 680-700g with juice)
2-3 tbs instant galantine 
juice of half a lemon


Preparation:

Preheat your oven to 160°. Then, start by mixing the crushed cookies and almonds with the melted butter and cinnamon. Mix it all well and then, fill it in a baking tin and press it down with a spoon or your hands and put it in the fridge. Now you are ready to make the filling. Thereto, put all the ingredients in a large bowl and mix it all at once with a hand mixer. Make sure, that you don't over mix it as it should be as dense and creamy as possible and there should be no air in it. After that, you are ready to pour it all in the baking tin and bake it for about 60-70 minutes depending on your type of oven. Just make sure it is a little bit brown on the sides and cooked in the middle.
Now, let the cake cool completely. In the mean time, pur the juice from the cherries in a small sauce pan, then stir in the galantine with a whisk. As it thickens, add the cherries and stir them gently. 
Now you are ready to pur them on top of the cake and place it in the fridge until you serve it. 


Sunday, 7 December 2014

Cinnamon and Cointreau Chocolate Almonds

Hello my sweet ladys and gentlemen,

this weekend my husband and I went to a really nice winter market. We had so much delicious food and the best blueberry mulled wine with awesome spices in it. The atmosphere was so nice and I really enjoyed wandering around the streets with all the little market stands, fairy lights all over and the sweet scent of hot wine punch, gingerbread and roasted almonds. It was all so perfectly cozy and magical. I loved it!
And of course we had to get some delicious chocolate covered almonds...but why not try to make some at home? It couldn't be that difficult. So I searched through the internet and read thousands of recipes. Then, I came to a conclusion and created my own personal recipe.
First, I turned on some relaxing Michael Bublé music. Then, I roasted some almonds in Contreau Orange liqueur. After letting them cool, I melted some milk chocolate and added vanilla extract and cinnamon in a pan. After that, I poured the delightfully smelling almonds in the sweet chocolate melt and stirred them in there until they were all completely covered in chocolatey goodness to then, roll them in an awesome composition of powdered sugar and different spices...
Seriously, this is amazing. You can create your own custom made Chocolate Almonds and you can decide what ever flavor you want.
Surely, it makes a little mess but why not dare to try something new and discover the joy of a home that smells like a winter fair itself?


Ingredients: 

500g plain almonds
3 tbs Cointreau Orange liqueur
100g chocolate
pinch of salt
a few drops of vanilla extract
100g powdered sugar 
2 tsp cinnamon
1 tsp anise
1/2 tsp nutmeg 

Preparation:

Pour all the almonds in a medium sized pan and then, pour the liqueur over them. Now, roast them until they are lightly brown and it smells kind of roasty. Set them aside and let them cool completely. Then, in another pan, melt the chocolate and add the 1 tsp of cinnamon, a pinch of salt and vanilla extract. Now, you are ready to pur the almond in there, remove the pan from the heat and stir until all the almonds are covered completely.
Then, put them one after another on a lined baking tray and let it cool.
Now, yore ready to put powdered sugar, 1 tsp of cinnamon, 1tsp anise and 1/2 tsp of nutmeg in a large bowl and mix it really well together. After that, put all the almonds in there, place a lid on top of the bowl and now shake and swing the bowl around until all the almonds are rolled and covered in the coat of winter flavors.


 Now have some fun and scare the winter blues away! :)